No-Sew Full Reupholster Chair
Hello all, Emily here. I did something big, time consuming and somewhat difficult. But I did it! I have been wanting to reupholster a chair for a while. I have dabbled in redoing chairs, but they were simple cushion redo's. Yet, this fourth dimension I tackled the full, big time, full reupholster. I also challenged myself and did this with admittedly no sewing!
 View in gallery
  View in gallery
 In that location is not too many examples of this on the internet, and then it was a lot of trial and error for me. I purchased this chair from a 2nd hand store. It was outdated and had a horrible color. Only, I liked the bones of the chair.
 View in gallery
 The first step in reupholstering this chair is taking it apart. I did not know what kind of shape the cushions under the material were in. Once all apart I would be able to see how much needed to exist replaced.
 View in gallery
  View in gallery
 In one case I had the chair apart I realized all of it needed to exist replaced. I did not fifty-fifty take pictures of information technology. The cushions had a smell to it and I just wanted them off and out of my house. So everything was stripped but the wood and the springs. I did save the textile that was on top to employ as a template if needed for the new material.
 View in gallery
  View in gallery
 I purchased a lot of foam. I purchased ii big squares that are three inch thick foam. Two yards of 1/two inch foam, and 1 bundle of quilting cotton batting.
 View in gallery
  View in gallery
 The first step in this reupholster task was to get the seat absorber done. Setting the large square cream on the seat and marking information technology to the size of the seat.
 View in gallery
 I beautiful the cushion down to size using a razor bract. I used the seat template from the former fabric to make certain I was not cutting too much. If I needed to revise and cutting more that would have been amend than too niggling.
 View in gallery
  View in gallery
 I cut the seat cushion, and fabricated certain it fit snugly.
 View in gallery
  View in gallery
 One time I had the seat cushion fitted accordingly. Before I started adding any cloth I needed to add the absorber to the sides of the chair. I am using the thinner cotton quilt batting to absorber the sides, artillery and to cover the cushions and bring them all together. This fashion any lines or dips in the cushions will be covered and hidden by the batting. I folded the batting in on the front of the chair.
 View in gallery
 I used a standard air stapler. It has enough power to push the staple through the fabric and into the forest of the chair.
 View in gallery
 I needed to cover it with the new material. I purchased a night greyness cotton fiber material, 3 yards worth. It is a durable, heavy and thick fabric. This will make information technology be less likely to get ripped. I also purchased a light gray with a pattern to go on the back of the chair. I purchased 2 yards of that textile.
 View in gallery
 The first step for this was to use the seat template from the original cloth to measure out where the new fabric should be cut. When it was cutting, I cutting slits in the fabric where the chair has a break in the wood backing. And so slipped the cloth through the back of the chair. This will assistance in keeping the material tight on the chair.
 View in gallery
 If this was a normal chair reupholster I would have sewn the cloth around the cushion. All the same, since this is a challenge to do this chair with no sewing the plan of action is to keep things as dainty and tight as possible. Making certain the fabric is pulled tight, almost squishing the absorber is the best way to make certain all stays secure and in identify.
I wrapped the forepart of the fabric effectually the seat cushion and the bottom of the chair. I then pushed the cloth under the chair and stapled it downwardly.
 View in gallery
 I pulled the back of the material of the seat cushion very tightly and stapled that as well.
 View in gallery
 Once I had the cloth stapled to the seat cushion I needed to make it look smashing and tidy. The corners were a niggling bit of a issue. I decided the best way to make them await every bit good as possible was to make a diagonal fold on either side of the chair. Pulling tightly so that at that place is no give when anyone sits downwards.
 View in gallery
 The cushion was washed and secure, because of the securing of the absorber and the material to the front end and the underside of the chair.
 View in gallery
 The next footstep was to make the cushion for the back of the chair. I placed the thinner cushion on the dorsum. Cut effectually it.
 View in gallery
 Beingness certain of the cuts and making the absorber fit into the groove of the chair back.
 View in gallery
 I lined the rest of the sides of the chair with the folded over quilt batting. Stapling it into place.
 View in gallery
 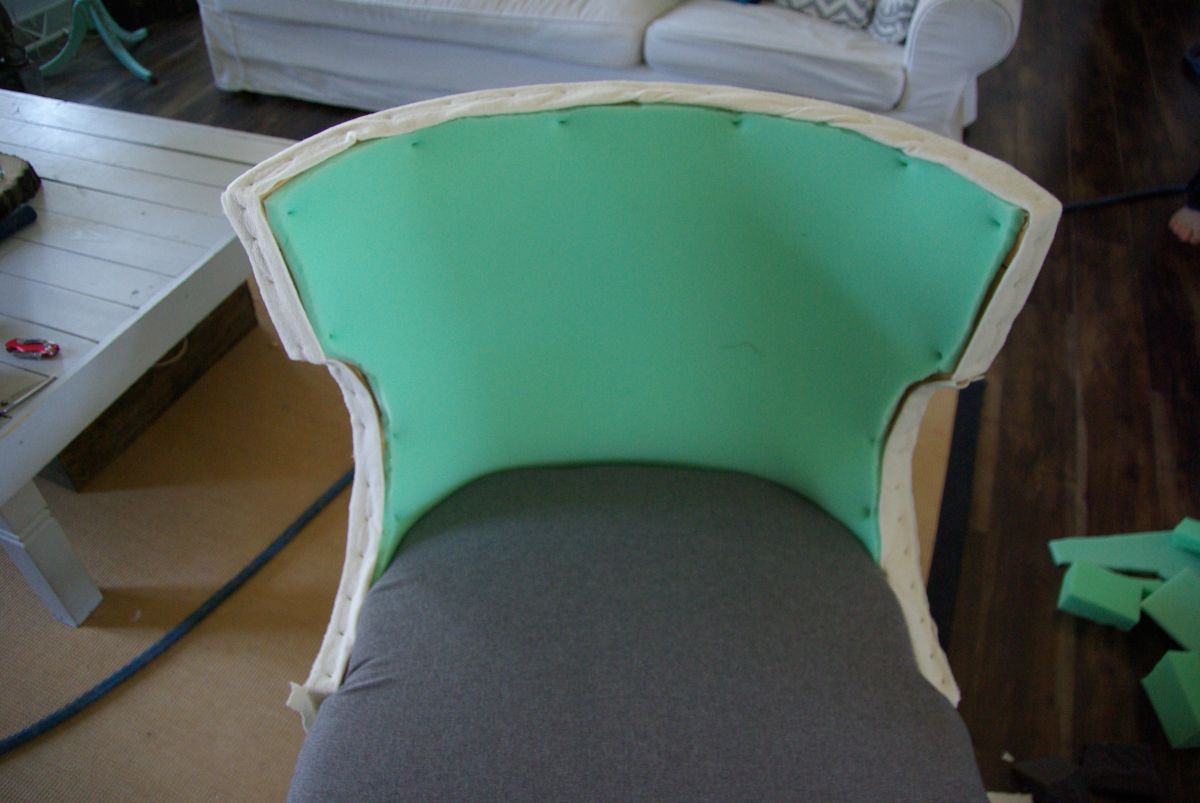 View in gallery
 The back of the chair is broken upwards into three sections, with wood separating them. The middle section is the biggest, and the two sides are narrow and odd shaped. The eye department was easy to add the absorber to. Elementary cute were fabricated to brand information technology fit into place.
To get the shape for the sides correct with the cushion I ready a piece of paper on the side and traced a template.
 View in gallery
 Set up the template on the cushion.
 View in gallery
 Used a razor bract and cut along the template into the cushion.
 View in gallery
 I repeated on both sides and got both sides cut and fitted properly.
 View in gallery
 The back cushions was wedged in almost perfectly. Which was needed in club to make the cushions stay in place.
 View in gallery
 The plan was to make the cushions secure past adding the quilt batting over the cushions. This volition be pulled tightly and will hold the back cushions in place. To do this I fastened the quilt batting to the peak of the chair, leaving the long portion of the batting behind the chair. Which will eventually be used as the absorber back up.
 View in gallery
 I pulled it tightly and stapled the top and the bottom of the quilt batting. Now the whole chair was cushioned and secured.
 View in gallery
 To motility this along the next step was to add together material to the front of the chair where your back sits on the chair. It was difficult because of the natural curve in the chair. Before I tackled that headache I cut and stapled the the elevation portion of the fabric to the chair, all forth the back and the upper portion of the side.
 View in gallery
 To make the bend work with the material I tried a few different things. The 1 that I found worked the all-time was to cut slits in the cloth. I was then able to manipulate information technology and pull information technology tight in portions. Assuasive the material to wrap around the curve that way. All of the fabric that was being pulled and stapled to the back volition be covered by the calorie-free patterned gray material. So making the dorsum of the chair neat correct now is non a problem.
 View in gallery
 The best advice I tin give for the whole project is to pull it as tight every bit possible. All of the textile will naturally accept a lot of give when being sat on so to minimize that the fabric needs to have the least amount of give as possible without ripping the fabric. I did not go a perfect curve, there is a bit of lines on the curve. With this being a no sew together one I expected some of the lines wold not exist perfect.
 View in gallery
 One time the cloth was fitted effectually the curve I cut the excess fabric, to help in minimizing any lines that might bear witness through the dorsum material.
 View in gallery
 The front end of the chair was done, merely I needed to add the cloth buttons to the front which will add together item and suspension up the wait of the front of the chair. To do this I purchased cloth buttons, and cut portions of the light patterned fabric. I wrapped the buttons in the fabric, to make them popular confronting the dark gray fabric.
 View in gallery
 The dorsum of the textile buttons have a small loop in it. This loop is used to tie the string to the back and pull information technology through the fabric and secure it in the back.
 View in gallery
 I marked where on the back seat portion of the chair I wanted the fabric push button to go. Looped the string through the button.
 View in gallery
 Then button the needle through the back of the chair, pulling all of the string with it.
 View in gallery
 The button will be pulled up with the cord.
 View in gallery
 The buttons were on and the detail was added to the front end.
 View in gallery
 With the forepart of the chair fully done, I am able to add the back fabric to the chair. I did this by folding the light greyness fabric forth the pinnacle back of the chair.
 View in gallery
 Stapling it along the seam where the staples of the dark textile was pulled and secured to.
 View in gallery
 I was getting so excited because I knew in one case this was secured I but had one more pace until this chair is finished. I cut the cloth and folded information technology along the back of the chair. Trying to continue the fold lines evenly striking the chair.
 View in gallery
 I wrapped the fabric under the chair. Cutting the cloth to fit around the legs of the chair.
 View in gallery
 I needed a style to hide all of the staples, so I planned on using upholstery nails. There are strips bachelor to employ, but they need to be sewed on. Even so, because of my personal challenge of not sewing this at all I am using private nails for this. Pushing in the nails, ane by one.
 View in gallery
 I was able to hide all of the staples and folds with the upholstery nails. It adds a dainty petty particular to the chair, too as hides all of the piece of work and folding that went into it. I stood back once all was done, and was so excited. I accomplished a no sew full chair reupholster.
 View in gallery
 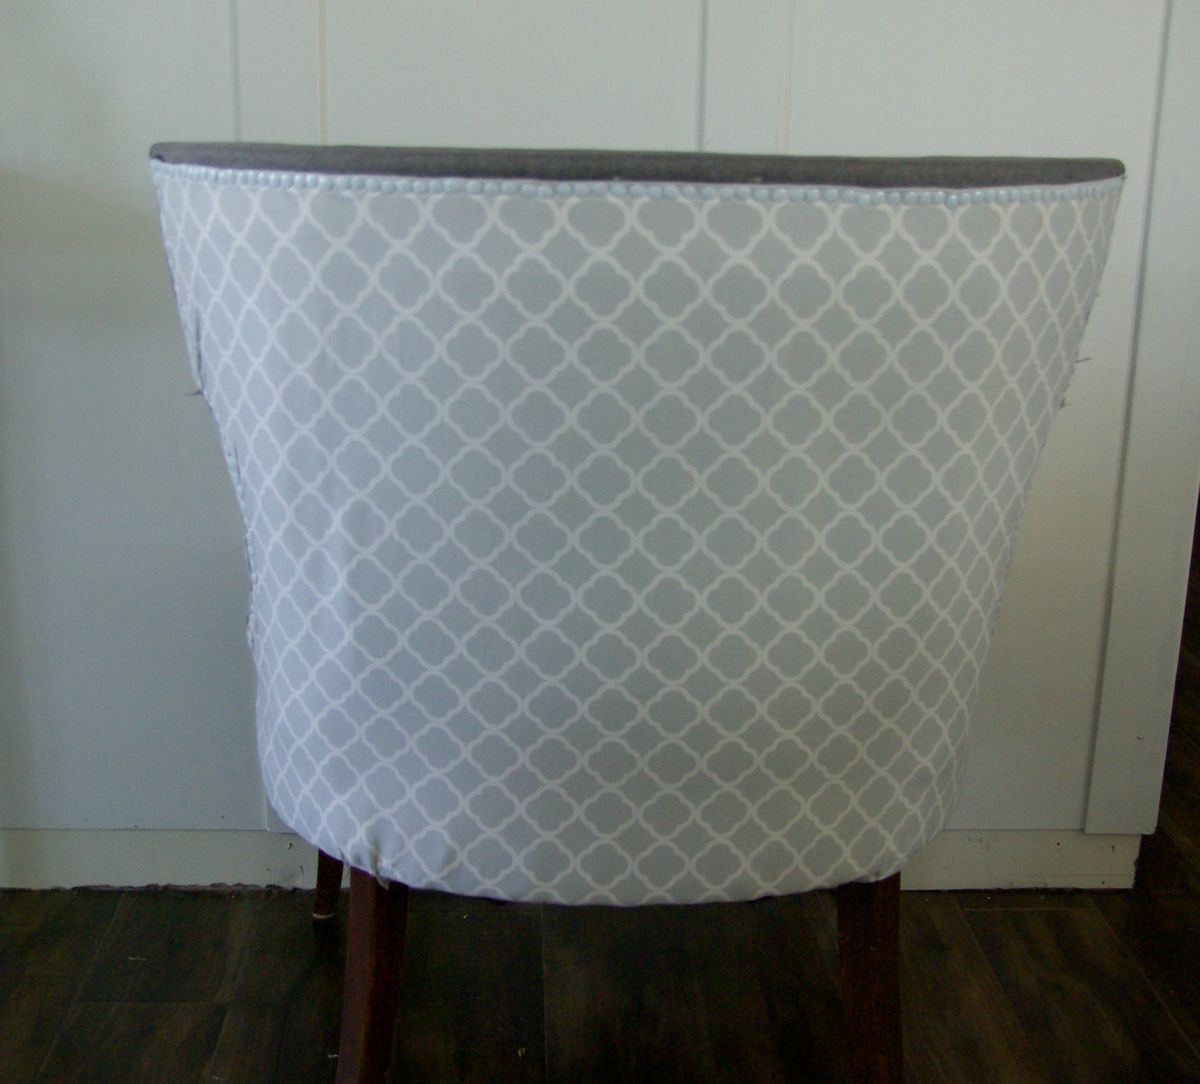 View in gallery
 There is a few portions of this that could accept been better if I did sew it. However, non everyone has the supplies or skills to run up things. The merely supplies I needed for this was a heavy duty air stapler, pair of scissors, and long staples. All things that virtually people have or can easily even hire from a home improvement shop.
 View in gallery
  View in gallery
  View in gallery
 The chair is nice and soft. There is no hard spots or portions where the wood is felt. Calculation all of the layers was needed and made this chair as comfy every bit possible.
 View in gallery
 This chair had a lot of steps, a few headaches, and a lot of time. But, none of the steps were too complicated, and most was able to figured out by moving the material and trying things out. If I had chosen a chair without the curved edge it would take been a much simpler job.
 View in gallery
 I think redoing this chair without sewing information technology makes a great upwardly wheel. I have seen many chairs in g sales or secondhand stores simply take been deterred from buying them because of the pattern of the fabric. This fashion of doing it makes it possible for anyone to redo a chair that they similar the bones of, just want to redo the look of it. This is a groovy idea to modernize or modify upward the expect of a room. Having sewing skills is not needed to become the chore done and have a beautiful chair that is both comfortable and stylish.
harnessdoccujjoinds.blogspot.com
Source: https://www.homedit.com/reupholster-chair/
0 Response to "No-Sew Full Reupholster Chair"
Post a Comment